hexo SEO 적용하기
지난 글들에 이어 블로그에 SEO를 적용해보았다.
크롤링 개선
description
게시글마다 description을 추가해주었다.1
2
3
4
5
6
7
8---
title: SEO 알아보기(2)
date: 2021-11-30 16:15:36
tags: [seo]
description: GOOGLE 검색 센터를 통해 검색엔진 최적화(SEO)에 대해 더 자세하게 알아보자.
category: [seo]
toc: true
---
호환성 검사
블로그의 HTML을 검사하였다.
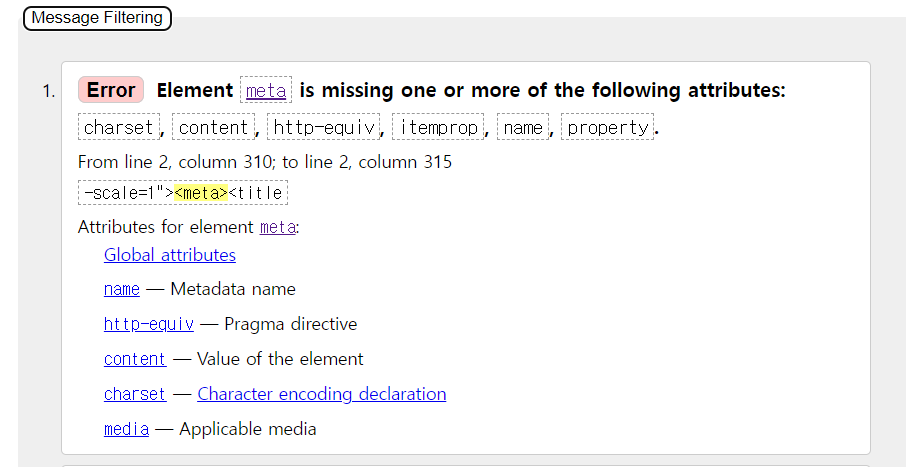
빈<meta>태그가 있다.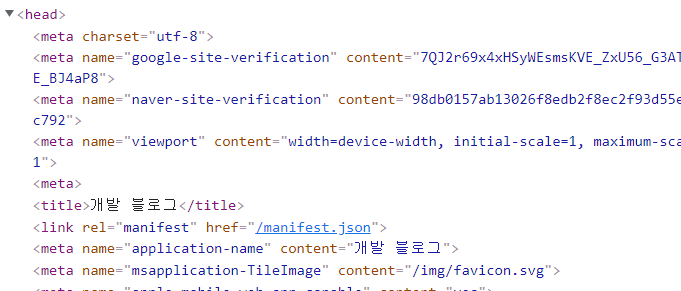
./theme/icarus/layout/common/head.jsx
1 | { |
다만 이 부분은 hexo 내부 로직이라 혹시나 발생할 사이드이펙트 때문에 수정하지는 않았다.
검색엔진에 등록하기
검색엔진에 내 사이트 정보를 등록하였다. 안 하여도 되지만 조금 더 빨리 크롤링 된다고 한다.
등록 뒤에도 며칠 기다려야 한다..! 사이트마다 어떻게 등록했는지는 사진을 찍어두지 못하였다.
Naver
네이버 웹마스터 도구 에서 사이트를 등록하였다. 등록 후엔 간단 체크로 체크해볼 수 있다. 사이트맵과 rss제출도 할 수 있다.
./theme/icarus/layout/common/head.jsx 소유권을 인증하는
<meta>태그를 삽입하였다.1
<meta name="naver-site-verification" content="...">
Google
구글 서치 콘솔에도 등록하였고, 사이트맵과 rss제출도 할 수 있다.
./theme/icarus/layout/common/head.jsx 소유권을 인증하는
<meta>태그를 삽입하였다.1
<meta name="google-site-verification" content="...">
daum
다음 검색 등록은 rss제출과 사이트맵 제출을 요구하지 않았다.
플러그인
hexo에선 SEO적용을 돕는 여러 플러그인을 지원한다.
나는 아래와 같은 플러그인을 적용하였다.
hexo-autonofollow
hexo-autonofollow는 블로그 내의
<a>태그마다 자동으로 nofollow 속성을 추가해주는 플러그인이다.
사이트와 연관되지 않은 url들의 크롤링을 막는 기능을 한다.다음과 같이 설치할 수 있다.
1
npm install hexo-autonofollow --save
_config.yml 파일에 다음과 같이 적용한다.
1
2
3
4
5nofollow:
enable: true
exclude: //제외할 호스트
- exclude1.com
- exclude2.comhexo-generator-seo-friendly-sitemap
hexo-generator-seo-friendly-sitemap은 자동으로 sitemap을 생성해주는 플러그인이다.
다음과 같이 설치할 수 있다.
1
npm install hexo-autonofollow --save
_config.yml 파일에 다음과 같이 적용한다.
1
2
3
4sitemap:
path: sitemap.xml //sitemap의 경로
tag: false
category: falsehexo-generator-seo-friendly-sitemap
hexo-generator-seo-friendly-sitemap은 자동으로 sitemap을 생성해주는 플러그인이다.
다음과 같이 설치할 수 있다.
1
npm install hexo-autonofollow --save
_config.yml 파일에 다음과 같이 적용한다.
1
2
3
4sitemap:
path: sitemap.xml //sitemap의 경로
tag: false
category: falsehexo-generator-feed
hexo-generator-feed은 자동으로 RSS 피드를 생성해주는 플러그인이다.
다음과 같이 설치할 수 있다.
1
npm install hexo-generator-feed --save
_config.yml 파일에 다음과 같이 적용한다.
1
2
3
4feed:
type: rss2 //rss
path: rss2.xml //경로
limit: 20 //url수hexo-generator-robotstxt
hexo-generator-robotstxt은 자동으로 robots.txt를 생성해주는 플러그인이다.
다음과 같이 설치할 수 있다.
1
npm install hexo-generator-robotstxt --save
_config.yml 파일에 다음과 같이 적용한다.
1
2
3
4
5
6
7
8
9
10
11
12feed:
robotstxt:
useragent: "*"
disallow:
- /one_file_to_disallow.html
- /2nd_file_to_disallow.html
- /3rd_file_to_disallow.html
allow:
- /one_file_to_allow.html
- /2nd_file_to_allow.html
- /3rd_file_to_allow.html
sitemap: /sitemap.xml
ref
마무리
SEO작업을 마무리 하였고, 결과 반영까지 기다리는 중이다..!
최소 5일정도 걸린다고 하니 그 떄까지 기다려보고 문제가 있으면 다시 수정해보아야겠다.