hexo icarus 테마 내 정보 수정하기

Icarus 테마를 이용해 배포는 완료했지만 블로그가 예쁘지 못하다.
또한 사이트 내에 표시되는 내 정보를 수정해주었다.
이를 수정해주었다.

hexo에는 두 개의 yml 파일이 있다.
_config.yml 파일과 _config.icarus.yml파일이다.

사이트 제목 바꾸기

_config.yml에선 웹페이지에 대한 정보를 설정할 수 있다.
_config.yml의 # Site를 다음과 같이 수정해주었다.

1
2
3
4
5
6
7
8
# Site
title: 개발 블로그
subtitle: ""
description: 프론트엔드를 공부하고 있습니다.
keywords:
author: 박성현
language: ko
timezone: "Asia/Seoul"

favicon과 홈버튼 바꾸기

_config.yml에선 favicon과 icon도 설정할 수 있다.

1
2
3
4
5
6
7
8
9
10
# Version of the configuration file
version: 4.0.0
# Icarus theme variant, can be "default" or "cyberpunk"
variant: default
# Path or URL to the website's logo
logo: /img/logo.svg
# Page metadata configurations
head:
# URL or path to the website's icon
favicon: /img/favicon.svg

나는 themes/icarus/source/iimg의 favicon.svg와 logo.svg파일을 아주귀여운강아지에서 찾아 svg를 바꾸어 주었다.

_config.yml에 대한 더 많은 정보는 Hexo 공식문서에서 찾아볼 수 있다.

자기소개와 설명 바꾸기

위에서 소개와 이름을 작성해도 실제 사이트에 접속하면 자기소개에 반영되지 않는다
_config.yml에서 설정한 정보들은 다음 그림과 같이 <head>태그에 들어간다

head tag

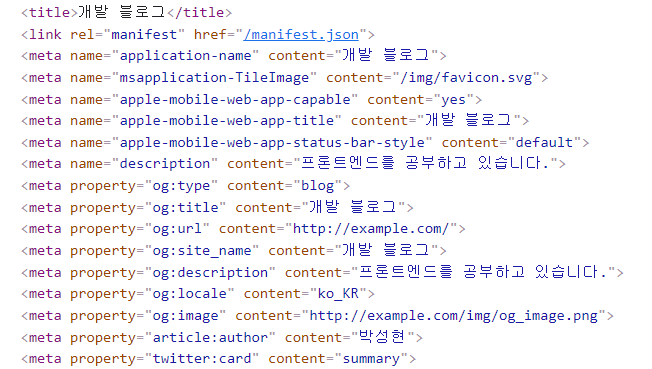
사이트에 표시될 정보들은 _config.icarus.yml 에서 설정해주어야 한다.
_config.icarus.yml 파일을 다음과 같이 수정해주었다.

깃허브와 facebook등은 천천히 수정할 예정이다.

1
2
3
4
5
6
7
8
9
10
11
12
13
14
15
16
17
18
19
20
21
22
23
24
25
26
27
28
29
30
31
32
33
34
35
36
37
38
39
40
41
42
43
44
45
46
47
48
49
50
51
52
53
54
55
56
57
widgets:
# Profile widget configurations
- # Where should the widget be placed, left sidebar or right sidebar
position: left
type: profile
# Author name
author: 박성현
# Author title
author_title: 프론트엔드를 공부하고 있습니다
# Author's current location
location: Seoul
# URL or path to the avatar image
avatar: /img/profile.webp
# Whether show the rounded avatar image
avatar_rounded: true
# Email address for the Gravatar
gravatar:
# URL or path for the follow button
# Links to be shown on the bottom of the profile widget
social_links:
Github:
icon: fab fa-github
url: "https://github.com/pshdev1030"
Linkedin:
icon: fab fa-linkedin
url: "https://www.linkedin.com/in/pshdev1030"
# Table of contents widget configurations
- # Where should the widget be placed, left sidebar or right sidebar
position: right
type: toc
# Whether to show the index of each heading
index: true
# Whether to collapse sub-headings when they are out-of-view
collapsed: true
# Maximum level of headings to show (1-6)
depth: 3
# Recommendation links widget configurations
# Categories widget configurations
- # Where should the widget be placed, left sidebar or right sidebar
position: left
type: categories
# Recent posts widget configurations
- # Where should the widget be placed, left sidebar or right sidebar
position: left
type: recent_posts
# Archives widget configurations
- # Where should the widget be placed, left sidebar or right sidebar
position: left
type: archives
# Tags widget configurations
- # Where should the widget be placed, left sidebar or right sidebar
position: left
type: tags
# Google FeedBurner email subscription widget configurations
# Google AdSense unit configurations
# Plugin configurations
# https://ppoffice.github.io/hexo-theme-icarus/categories/Plugins/

hexo +github를 이용하여 블로그 만들기

hexo와 github를 이용하여 블로그를 만들었다.

환경

  • node.js
  • github

Hexo 설치

1
npm install hexo-cli -g

원하는 디렉토리로 이동하여 hexo 초기설치를 해준다.

1
2
3
hexo init [블로그명]
cd [블로그명]
npm install

설치가 완료되면

1
hexo server

localhost:4000에 접속하여 확인할 수 있다.

icarus 테마 적용하기

[블로그명] 디렉토리의 thems 폴더에 가서 icarus repo를 clone한다.

1
2
cd ./themes
git clone https://github.com/ppoffice/hexo-theme-icarus.git

그리고 clone된 hexo-theme-icarus 폴더의 이름을 icarus로 바꾼다.

1
mv hexo-theme-icarus icarus

그리고 나서 로컬로 다시 실행한다

1
hexo server

에러가 뜨면 필요한 패키지들을 설치한다.
설치가 안 될 경우 –legacy-peer-deps 플래그를 붙인다.

1
npm install --save [모듈들]... --legacy-peer-deps

설치 후 로컬로 다시 실행하면 icarus 테마가 적용된다

  • 적용되지 않을 경우 ide를 껐다가 다시 킨 후 실행하면 된다.
1
hexo server

배포하기

깃허브는 사용자계정.github.io로 무료 호스팅된 페이지를 사용할 수 있게 해준다.

사용자계정.githob.io라는 이름의 저장소와 블로그 소스파일을 저장할 저장소 총 두 개의 저장소를 만든다.

그리고 Settings 페이지의 Github Pages 항목에서 Source 옵션을 Master or Main으로 설정한다.

다음 루트경로의 _config.yml 파일의 deploy항목을 다음과 같이 수정한다

1
2
3
4
deploy:
type: git
repo: https://github.com/사용자계정/사용자계정.github.io.git
branch: 브랜치명

배포를 위해선 플러그인도 설치해주어야 한다.

1
npm install --save hexo-deployer-git

정적 리소스 생성하고 배포하기

정적 리소스는 다음과 같이 생성한다.

1
hexo generate

배포는 다음과 같이 한다.

1
hexo deploy

정적 리소스를 삭제하는 명령어는 다음과 같다.
수정했는데 업데이트가 되지 않을 경우 사용하면 된다.

1
hexo clean

정적 리소스 생성 및 배포는 다음과 같이 하면 된다.

1
hexo deploy --generate

소스파일 저장하기

1
2
3
4
5
git init
git remote add origin 소스파일을 저장할 저장소
git add .
git commit -m "메시지"
git push origin master

Reference

https://velog.io/@recordboy/%ED%97%A5%EC%86%8CHEXO%EB%A5%BC-%EC%9D%B4%EC%9A%A9%ED%95%9C-%EA%B9%83%ED%97%88%EB%B8%8C-%EB%B8%94%EB%A1%9C%EA%B7%B8-%EB%A7%8C%EB%93%A4%EA%B8%B0